Chevy Tri Five Forum banner
1 - 20 of 24 Posts

Chevynut

· member
Joined
·
12,101 Posts
Discussion starter · #1 ·
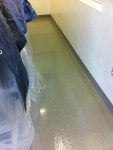
After reading a post and seeing pics of a garage floor newly painted today, I got interested in doing my shop floor again sometime before winter....if I have the time ;).

I looked at Ucoat-it floor finish some time ago, but thought it was expensive. I am looking at the Rustoleum Professional Floor coating, and it would cost me around $300-400 for the base epoxy for my ~1150 square foot shop at 300-400 square feet per $99 kit, plus $300 for the clear coat, $10 or so for the anti-skid additive, and $50 or so for brushes, rollers, etc. I think I'd be into it for $800 without any of the cleaners or etchants. If I buy locally, I pay almost 9% tax so I'm almost at $900.

Ucoat it supplies a kit with the base epoxy, activator, urethane topcoat, rollers, anti-skid material, mixing bucket, for $959 shipped, or $525 without the glossy topcoat.

To me the difference in cost is almost a don't care, and the Ucoat-it seems like more of a commercial/industrial material.

Do any of you have any experience with these products? Is there a significant difference in them?

The Rustoleum is a solvent-based epoxy, while the Ucoat-it is water based. It sounds like the Ucoat-it system is pretty durable, but with the urethane clearcoat I would think it would be hard to repair if it got damaged. But I don't know how easy it is to damage it either. I drop a lot of hot metal pieces on the floor, so if it burns it and I can't touch it up I would be upset. And I'm not that careful with dropping tools and stuff, so I would want to be able to re-coat the floor easily.

Any advice or experiences to share? I can get the Rustoleum locally, but I have to order Ucoat-it and if I need more I'd have to order again. That's a downside to me.
 
Cnut,

I've used both and frankly, I wouldn't use either. I recommend a 100% solids epoxy. I really think UCoat-it is an extremely poor value. The quality of the product is good but the mil thickness is very, very thin compared to the 100% solids system. Both UCoat-it and Rustoleum are going to be in the 40-50% solids range. I think the water based UCoat-it is about 42% solids.

The last 2 floors I have done are with Wolverine and with Epoxy Coat.

If I were to do a floor that I intended to abuse, I would go with the Epoxy Coat without flakes and without clear. This is what I did in my workroom that gets used for welding, body work and painting. This floor has already taken a lot of abuse and is holding up well but is not that pretty at this point. However, it can be sanded and recoated very easily to make it look nice again.

If I were to do another floor I wanted pretty, I'd go with the Wolverine system of a primer, color, flakes, and urethane clear. This is what I did in the general area of my shop that gets used for only the light mechanic work and my recreation area.

My Epoxy Coat floor was put on at about 15 mils in one coat. And my Wolverine floor was 5 mils for primer 12 mils for color and 2 coats of urethane clear (4 mils each) for a total of 25 mils. Compare that to the UCoat-it system. Even with the clear I believe the total mil thickness is about 5 mils. Every little defect in your floor will show through with UCoat-it and if the concrete has any roughness when you start out, it will wear through pretty quickly.

When you do price comparisons, you really need to account for the thickness of the material after curing. You get over twice the product with a gallon of 100% solids epoxy than you do with one where upwards of 60% evaporates away.

100% solids epoxies are poured out of a bucket, squeegeed out to cover the floor and then back rolled smooth (spiked shoes are recommended). Water based and solvent based are normally rolled out of a standard rolling pan like house paint.

Take a look at the documentation I did for my Wolverine floor:
http://www.garagejournal.com/forum/showthread.php?t=26308

Addition:
Take a look at the bottom of the mainpage of the Alphagarage (Wolverine) site. They are using me as an advertisement. (With my permission of course.)
 
There is another factor here. Durability of any product may be greatly reduced if it's applied to a surface that's not new. Comments?
Rick,
Take a look at my documentation of my Wolverine floor.

I would say that the durability is not reduced on an older floor if it is prepped properly and the concrete is still in good condition. The biggest issue on an older floor is getting it de-greased properly. But, that is not that hard to do.

In any case, concrete must be either acid etched, diamond ground or shot peened for epoxy to adhere well.

Most epoxies recommend acid etching since it's the cheapest way to go and doesn't require any special equipment. But, I've done that and would never do it that way again. I believe it is much better to grind the floor. Next time I may rent a diamond grinding or shot-peening machine versus they way I ground mine in that thread. The way I did it worked fine, it was just a little slow and hard on the back.
 
Laz... Why just this weekend I went the rounds with the garage floor. I am familiar with the U Coat it. My brother went that way with the garage floor and then went a different way on his shop. I did the same product he used in the shop... Love it. Its made by PPG.

See the pics below. I used the PPG kit. It uses a product called Aquapon 35, its a 2 part epoxy... not sure about its make up, but we did 25,000 sq ft at my business with this product about 4 years ago, and it holds up to forklift traffic etc. At the business we did 2 coats of gray and at home I did 1 coat of gray and 1 coat of the high performance gloss. From what I have learned, the strength of the floor system is in the top coat. However, 2 coats of the epoxy are pretty strong on their own.

I am also concerned with weld spatter and grinding. Not sure about touchups with the high gloss. If you were to do 2 coats of just the gray, it could be easily touched up from time to time I think, as long as it was clean and prepped to take it. (many colors to choose from as well as chip colors)

The U coat system, to me, seemed a bit costly too. But the high gloss top coat is about 150 per gallon.... so thats not real cheap either.

I clean/degreased, acid etched, neutralized, dried over night with fans and industrial sealed/caulked the cracks.

As I have lots of "stuff" I moved it all to one side and did half the garage, other half in two weeks.

You might also avoid the chips if you want to touch up periodically. I'm hoping the floor lasts for a while and withstands my abuse... time will tell.

Good luck
Gil
 

Attachments

I am also concerned with weld spatter and grinding. Not sure about touchups with the high gloss.
All epoxies and urethane top coats will burn with weld spatter. You've either got to protect the floor or just allow it to get burned.
I wouldn't use a clear at all on a floor that was used for welding. It's better to go with color only so it can just be sanded and re-coated whenever you want it looking fresh again.
For someone who welds all the time, an epoxy floor might not be the best choice. However, the epoxy floor in my workroom that has been abused for a couple of years now is still great for cleaning up oil spills and sweeping up dirt and that's why I wanted epoxy in there. But, between the burn marks and paint overspray, it's not pretty right now.
 
Roger, looks like you did this 3 years ago. How is it holding up? I know you're bragging on it, but what has worn and how bad?

What was the material expense? I'm assuming you did all the labor yourself. (Sorry if it's answered in your link, I read the first page but not all.)
 
Chevynut I used U coat it and frankly I am not so sure I would again, It actually scratches pretty easy , the oil and whatnot wipes up really well , though hot tires do leave marks . These marks will rub off though. If you plan to park in there in the winter the worst part is that nothing soaks in . I spent half the winter slopping out slush and dirt etc. I have cut above it but not to the extent that you will be. Another funny thing is if you use flakes it makes it difficult at times to find a dropped nut, washer etc. It looks real pretty , but longterm I dont know

Ken
 
Another funny thing is if you use flakes it makes it difficult at times to find a dropped nut, washer etc. It looks real pretty , but longterm I dont know
That is just old age my friend, glasses will fix that LOL:)
 
Roger, looks like you did this 3 years ago. How is it holding up? I know you're bragging on it, but what has worn and how bad?
What was the material expense? I'm assuming you did all the labor yourself. (Sorry if it's answered in your link, I read the first page but not all.)
Rick,
Yes, I am bragging on it. But, really, I think it's just more important to go with a 100% solids product versus the ordinary consumer products like UCoat-it, Rustoleum or Quikrete that are less than 50% solids.
There are many different companies that make 100% solids epoxy. I think there is even a pro grade Rustoleum that is. The most important thing to consider with 100% solids is the working time. They can vary some and hot weather will shorten the time. Planning needs to be done so you don't have it start to set up on you before you've got it spread and smoothed out.

I've talked about my workroom with Epoxy Coat where I've abused the floor already. It's not looking spiffy anymore but I am still very pleased with it. It's serves the purpose that I wanted out of it.

Here it is right after doing the floor:
Image


Here it is not long ago:
Image


Yeah I know I'm messy sometimes.:)

Now, the other area of my shop with the Wolverine.
It's holding up very, very well. You've probably seen this picture:
Image


I built up the frame and installed the engine and transmission right where it is sitting in that photo. I even did a little welding there (side motor mounts and tranny crossmember). A little spatter missed my welding blanket and put some burn spots in the floor. I haven't tried to touch them up yet but they don't stand out because the flakes kind of mask imperfections. The floor shows no effects from dropping tools, using jack stands or floor jacks at all. The urethane has lost it's sheen in a couple of areas but has not yellowed at all which urethane is not supposed to do. Where I sit and use the computer, I have a bench stool with rollers and right there the floor has dulled. It has also dulled where I stand a lot in front of the workbench by my toolbox. I would imagine this would polish back up but I haven't tried it. I did use Wolverine clear epoxy on the VCT tile that is on top of my workbench and it has yellowed under the windows. I would have used the urethane but was told it's adhesion to the VCT would probably not be good.

Here's a picture taken just last week that shows some of the floor (and a bunch of '55 parts):
Image


Here's one right after completing the floor:
Image


Cost:
The 660 ft2 that I did with the 3 step Wolverine cost me a little over $1,800 or about $2.75 per ft2 for just the products. Yes I did all the labor myself. Realize that I did go for Wolverine's most expensive options with extra flakes, urethane clear instead of clear epoxy topcoat and 2 coats of the urethane instead of one. If you are going to get any sun inside a shop at all, it's better to go with urethane than it is clear epoxy. Over time, fluorescent lights can also cause clear epoxy to yellow.

The Epoxy Coat for my 335 ft2 workroom cost $284 for a full kit at today's price and I think that's about what I paid almost 3 years ago. I discarded the acid etch and flakes that came with the kit. I tried their acid etch just for fun and thought it was garbage.
A full kit is enough product to do 500 ft2 at 9.7 mils but I had 335 ft2 so I just laid it on thicker.
 
Another funny thing is if you use flakes it makes it difficult at times to find a dropped nut, washer etc. It looks real pretty , but longterm I dont know
Ken
That's actually not so funny and needs to be considered in a workshop. What you say is very true. You can't find a dang thing dropped on a floor with flakes. That floor I showed in the pics I've posted is not my first shop with a flaked epoxy floor either so I already knew that downside but decided to do it again anyway. I cuss when I can't find something but I do keep one of those magnet tools handy and that helps.
 
Chevynut,
We did ours over 3 yrs ago, We used the Rustoleum Professional Floor coating w/ the Flakes and the Clear. The number one key is Cleanliness, We used a 50/50 cut of Marotic Acid and a Scrubbed w/ a Green Pad. Hosed it out really good and aloud to dry for 48 hrs. We then applied a coat useing a 3/4 nap roller without the chips, We then came back 24 hrs latter and applied a 2nd coat with a 3/8 nap and applied the chips, Let it Dry 24 hra and came back with a first coat of clear with a 3/4 nap roller without the anti skid sand. The Sand makes it hard to keep clean and with a 3/4 nap it leaves a nice texture o not be as slick. We came back another 24 hrs latter and applied a 2nd coat of the clear. As far as Cleaning the supplies, Its not worth the effort in my opion, Buy cheap plastic throw away pans, and just pitch the rollers, We used a total of 2 rollers, We cleand the first roller between the coats of pait, Threw away after 2nd coat, and the same with the clear. You will use 1 1/2 time the material doing it this way, However the final outcome is well worth it. We did a 30 x 50 shop and a 20 x 24 house garage at the same time and spent right at $1,200 from start to finish. My rear shop, the 30 x 50is used and abused, Its had a wide range of chemicals on it, Battery Acid, Brake Fluid, Brake cleaner, Paint thinner and much more and nothing has touched it. We use aDry Dust mop to sweep, and also every now and then we use a floor buffer to scrub it and polish if it gets to dirty. This has been over 3 yrs ago and for the most part it still looks as good as the day it was laid. Tools have been droped, Thrown and even had a fire on the floor from break cleaner and grinding and it didnt fave it, It polished right out. We had a 120 gallon Air Compressor 4 ft in the air between 2 latters, A latter gave way and the tank come crushing down, I was ****** and thought Oh My God, I dont want to sww the floor, Well beleave it or not, It put a hudge dent in the corner of the tank and never even hurt the floor, The produst claims to be 10 times stronger then concreat, I wouldn't believed it, However after I tried to clean my 5 gallon stir beater after is set up I do now bwlwave it, My grinfer even had a tough time cleaning the beater. If I was to do it all over again, I would do the exact same thing. Everyone that comes is just slobbers over it and say, Man I wish I had that in Mine. Oil will never seap through no matter how long it sits, You can just clean it up w/ a rag. I know we all have our opinions, However this is my experience. We used the Battleship Gray w/ Blue, White, And Black Chips
Hope this helps
Shawn :flag6:
 
Discussion starter · #13 ·
Guys, thanks for the info. Since my shop is packed with stuff, I'm going to be doing this in phases. I'll probably do it in 3-4 sections, depending on how much room I can make at one time. We need to organize the shop better and get rid of some stuff that I don't need in there, and this is a good time to do it. I'll probably re-paint the walls and ceiling at this time too. I want to put something on it that I can wash.

Roger, it sounds like for my purposes you would recommend the Epoxy Coat instead of the Wolverine epoxy system. I noticed that Epoxy Coat has the wrong information for the Rustoleum product. They say it's a water-based epoxy, but it's solvent based. It's also about 70% solids, not the 50% they state. I don't think they did a comparison of the Rustoleum Professional Floor Covering.

Anyhow, one issue I'd like some advice on is my troweled crack-stops or whatever you call them. I wanted the concrete guys to SAW the stops in rather than trowel them, but I didn't catch them in time. So now I have huge wide grooves in the floor that I want to fill. It makes it a PITA when using an engine hoist. Any recommendations as to what to fill them with? I think the floor has shrunk/settled/shifted all it's going to since it's been there for about 10 years now.
 
You have a few options on filling the saw marks in the floor, When we did ours, We used a Urathane cold made to fill concreate, Its flexable and will expand / contract with the concreate, Its in a Large tube and applies with a culking gun, There is also concreate culk in a culking gun tube, Or there is a concreate paths as well you can trowel down and fill in the cracks and smooth it out wirh a wet sponge as it dries, However as with anything, Prep is the key, Cleanliness and also use some kinda etch before hand to help it stick

Good Luck in whatever you do
Shawn
 
Roger, it sounds like for my purposes you would recommend the Epoxy Coat instead of the Wolverine epoxy system. I noticed that Epoxy Coat has the wrong information for the Rustoleum product. They say it's a water-based epoxy, but it's solvent based. It's also about 70% solids, not the 50% they state. I don't think they did a comparison of the Rustoleum Professional Floor Covering.

Anyhow, one issue I'd like some advice on is my troweled crack-stops or whatever you call them. Any recommendations as to what to fill them with? .
Cnut,

Yes, I think you should go with something like Epoxy Coat. Not necessarily that brand but a single coat of 100% solids epoxy applied to at least 10 mils thick with no flakes or clear coat. (Here's another one similar). The only problem with kits is you are paying for some things you won't use (at least I wouldn't). Those things are the acid etch, small roller cover, flakes and aluminum oxide grit. You will want the notched squeegee and mixing tool though. It comes with a 9" roller cover and I recommend not using that and buying an 18" roller handle and covers from Lowes. Also, I would definitely recommend renting a grinding machine to prep your floor with.

The only caveat to applying a single thick coat of epoxy is that concrete tends to out-gas when it's temperature is rising. When this happens, you can get bubbles in the finish. Applying epoxy in the morning can be the worst time for this. It is better to start the coating process in the evening when the temperature of the concrete is moving in the other direction. Another way to eliminate the problem is to use a thin water based epoxy as a primer coat the day before you apply the thick 100% solids coat but this adds to the expense of the job. It is what I did in my workshop and I did not get any bubbles. If you are seriously considering using Epoxy Coat, I would call Christine McGuire at the company and ask her about how to avoid this. You could also ask her if you can get a price on the 3 gallon units of epoxy without the accessories in the kit. If I were you, I would get 3 of the 3 gallon kits and do 1/3 of your 1,150 square feet at a time. This would give you about 12.5 mils thickness which I think would be perfect.

You could also talk to Fred at AlphaGarage about using the Wolverine system without flakes and without a clear topcoat. I don't think the price would be that much more if at all. The Wolverine system uses a clear epoxy as a basecoat applied at around 5-8 mils and then the color applied at around 12-20 mils. The price of their stuff is about $80/gallon but is purchased in 3 gallon kits. Their accessories are priced individually which is nice since you are not going to buy anything you don't need.

Wolverine has a really good product for filling cracks and joints. Here's a quote from their website:
"Even before you start to coat, you want a solid floor. If your floor has cracks and/or expansion or contraction joints, you can easily fill them before you epoxy, that will give you a smooth floor, which looks great and is easier to clean and maintain. To fill those cracks use Wolverine's IntegraFlex 1921, a 2 part 100% solids epoxy that will remain flexible to expand and contract with minor movements of the substrate."
Epoxy Coat may have a similar product.
 
Wow, $1800 at 3 years ago's prices for 660 sq ft? And you had to do the work yourself?

I could work in there after having done that. I'd be afraid I'd have to do it again.

And some people think billet hinges are expensive. :sign0020:
 
Since my shop is packed with stuff, I'm going to be doing this in phases. I'll probably do it in 3-4 sections, depending on how much room I can make at one time.
Cnut,

I think this approach is going to problematic if your shop is just one big area of 1,150 ft2
Applying the epoxy in sections isn't a problem at all. It's the prep that is. If you acid etch (which I don't recommend), you really have to do this in an empty shop since flushing with water is necessary. You also don't want muriatic acid anywhere around your equipment. Even the fumes will corrode things very quickly. And, I just don't have any faith in any of the organic acids giving the concrete any kind of rough profile you want.

If you rent a diamond grinder, you will only want to rent one once. And, it's very dusty. You don't want your equipment around that concrete dust either. Don't wear your good eyeglasses around this dust as well. It will ruin them. Ask me how I know.

You could grind the floor with a hand grinder like I did. But, it's still dusty even with one of those vacuum attachments (which is a must btw using this method).

I guess you could section your room off with plastic somehow but I just think you need to consider that everything needs to be removed from your entire shop while doing this job.
 
Wow, $1800 at 3 years ago's prices for 660 sq ft? And you had to do the work yourself?
I could work in there after having done that. I'd be afraid I'd have to do it again.
And some people think billet hinges are expensive. :sign0020:
If you think that is high, check out what professionals charge to do a garage.

Btw, looking at their prices today, it pretty much looks the same price as it was when I bought it. Not much inflation has taken place since then.

Yes, I did buy the Cadillac floor for my main area. But, I don't regret it. Wolverine's product really isn't more expensive than others (in fact, per mil, it is actually cheaper than others), there is just a lot of product on my floor.

Wolverine is cheaper per cured mil than UCoat-It is.

UCoat-it color is $230 for 2.5 gallon kit of 42% solids product.
That works out to be $219 per cured gallon of epoxy.
Wolverine is $235 for a 3 gallon kit of 100% solids product.
That's $78.33 per gallon of cured of epoxy.

Advertising can make some of these products seem cheap. But, you've got to do your research to see the reality.
 
1 - 20 of 24 Posts