Chevy Tri Five Forum banner

First Build

311K views 1.4K replies 92 participants last post by  oldskoolsalt  
#1 · (Edited)
55 3100 Build

I thought I'd start a thread on my truck build. It's been about six months and haven't gotten as far as I would like but I'm sure having fun.
I've had an awful lot of help, advise and inspiration from the great folks here and I look forward to hearing from you.

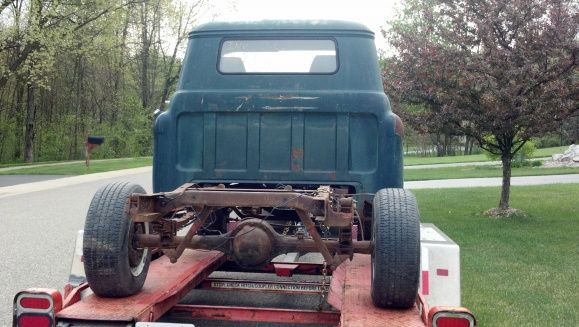
So anyway, this is what I started with and it was mostly torn down when I got it. The PO lost interest and it sat for a few years in his garage. And before you ask, no I could NOT have found a rustier one!

Image


Got the rest apart and started in on the frame, found a few spots where rust had gone through and had to make a patch or two.
Image


Have the suspension mostly done now (C4) , just need to finsh up sway bar links and placement.


Sure wish I hadn't waited so long to take on a project like this, I am absolutely loving it! Finally got it back on wheels, man I like seeing the progress.


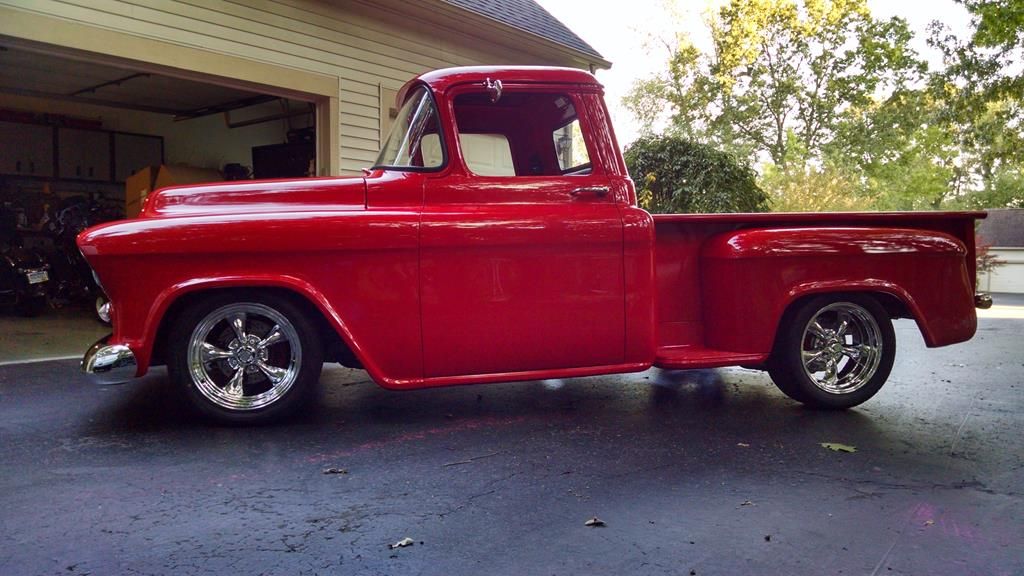
UPDATE: Here it is almost done five years later.


Image
 

Attachments

#9 ·
Thanks for all the encouraging words. Yes, that is the flat-out engineering front and rear with the earlier 84-87 suspension. Some guy by the name of BAM recommended them very highly! Don at Flat-out is a real nice guy and doesn't mind giving your tips and help.

I only get to work on the truck about every other weekend because it's at my cabin. No room at home! When I get up here I'm on a mission though.

Mostly working on the cab this weekend but will post plenty of pics.

Erwin:
I'm still thinking of a cool tag line... NOW THAT'S FUNNY!

Suede48:
I spent about 2 hours today filling the the 1 inch gap between the a pillar and the cowl, grind, fill, hammer, grind, oops burned through, fill, grind, curse. The second one took me ten minutes...nice fresh flap disc. lol.
 
#11 ·
Turning wrenches,having fun,feeling satisfied,and pressing on.It doesn't get any better than that.Your next break is on Super Bowl Sunday :sign0020:
Its looking good.:tu :tu :shakehands: :anim_25:
Big Bob:flag4::bowtieb:
 
#12 ·
Turning wrenches,having fun,feeling satisfied,and pressing on.It doesn't get any better than that.Your next break is on Super Bowl Sunday
You got that right Bob! God bless America! I did sneak out of the barn for a little bit today to watch my favorite QB throw it away. I won't name names. Ouch, man that one hurt.
 
#14 · (Edited)
Made some progress this weekend, nothing really exciting but I got pictures! Everybody loves pictures!

Filled in the holes in the floor. I'm doing a 90 deg swing pedal, so don't need brake and clutch holes. I'm going to close up the column hole once I get it set.


Cleaned up the firewall a little more and shaved those felt gasket housings for the pedals down below.


Patched up a big hole where the PO had clearanced his shifter. Actually I did that a while ago. Come to think of it, that took way too long. Lots O bends! Really stiffened the floor back up though. Still have to patch the bottom side when I get the cab flipped.


Fixed another clearance job for another shifter I guess. I have a three inch offset on my shifter so it should put me in the clear for putting it the hole in the trans cover. My trans cover looks like swiss cheese, I think might be better off timewise just finding a replacement.


All in all the cab and doors are not in too bad of shape. Next is finishing steps and another cab corner and hanging doors.
 
#19 ·
Thats funny, I have the same patch on my floor from a previous shifter location except mine was about 3-4 inches to the left, right into to floor reinforcement too. I also had a butchered trans cover, had like 3 to 4 different holes in it and it was the kind where someone took to the time to drill a thousand 3/8 holes to make the cutout, very jagged.. I bought a used one and welded up one quarter inch hole.

Looking at your pics doing all the metal work was the most fun I had, kinda miss that part now, looking sweet though!
 
#22 ·
Another bite out of the elephant!

Steps and cab corners.
Made a little more progress last weekend. As usual, not as much as I planned, but I need to be thankful I didn't have any screw ups I guess and keep focused on each "bite".

Found a spot a while back where the wire brush just ate through some weak metal. Glad that happened or I might not have seen it. It didn't show at all from the top side.


A little repair in the other end of the step support, which I also forgot about.

Finally, getting to the thing I started out to do

Took a tip from a Brothers tech article - step goes over the floor flange instead of under for a little cleaner look. Well, once I clean it up.
 
#24 ·
On to the other side. I bought the taller patch panels but probably didn't need to. Better safe than sorry.


I found it much easier to cut out the bulk of the step, leaving about two inches all they way around before drilling out the spot welds. I removed the first one in one big piece and looking back, that was really dumb! Oh well, you learn.


And this picture really made me feel pretty darn good.

And this one

Especially this one. Got it in the ten ring!
 
#28 ·
Looking great so far....very nice work! Thanks for the pics.:tu:tu:anim_25: with the rest of the build.

Eugene
 
#29 ·
Thanks Eugene, will keep them pics a coming.

WOW really looks good, nothing better than working on a project
Well maybe one thing, but it's a close second! Thanks.

looking nice buddy. Keep the pics coming.
You know I will! Sometimes I wonder if some of this stuff is even worthy of posting up, but EVERYBODY loves pictures! Thanks. Oh, thanks for the link to the third brake light. Just arrived yesterday. I want to see if I can sneak it in behind the dome light. Might be a little tight up there though.

Nice work, and I like the rally rims.:tu
Thanks Nev68 I appreciate the kind words. I love rally's too, but they'll eventually get replaced with something that shows off the discs and calipers.

Good looking welding & body work. :congrats:
:gba:
bowtie-trifive
Thanks Mickey. But you know I try really hard not to post up any pics of my raw welds. :sign0020:
 
#31 ·
Finally making some forward progress. I had a little hiccup in my cab corner and it was short by a 1/4" or so, so after all that cutting, welding and grinding I got to do it all over again. I had plenty of metal left from the first cut so I welded it back on so I could cut it back off. :banghead: Oh well it was good practice and it just made me work harder to make up the time.


Funny how well the other step fits this time


Closed off the floor inside because I won't be using the inner corners. A couple of quick welds and some seam sealer and life will be good.


Got the inner fenders cut and fit for clearance of the upper A arms. I'll have to double check with suspension fully collapsed but I think I'll have enough of an opening.


Third brake light went in way too easy. The kit comes with a steel face plate with a perfect cut out that you're supposed to weld in but I figured it would be a lot easier to just cut the slot into the back of the cab. If I messed that up I could always use the plate and never tell you all this story. :sign0020:


I'll post some more of the back side of the light housing next.