Steve Krause's Tropturq 56 Nomad Project
A while back Steve contacted me about helping him with a potential motor overhaul on is Nomad. He came up and we visited about it and some other things he wished to have done over the winter. We came to the conclusion that a new crate motor would be the best option.
Steve ordered the motor and a bunch of other parts for the project and had them drop shipped to me.

We will get the exhaust manifolds coated properly.


We will fix the top of the radiator.

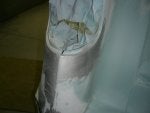
We also discussed the unsightly paint problem on the Ivory. The problem is that the paint used is weather checking real bad and he has just been touching it up to keep it stuck in place.
Over the winter I will be stripping all the Ivory on the exterior. Removing the DuPont fill N sand primer and redoing it with new state of the art epoxy followed with single stage Urethane 1956 Ivory
Stay tuned as I post updates.


A while back Steve contacted me about helping him with a potential motor overhaul on is Nomad. He came up and we visited about it and some other things he wished to have done over the winter. We came to the conclusion that a new crate motor would be the best option.
Steve ordered the motor and a bunch of other parts for the project and had them drop shipped to me.

We will get the exhaust manifolds coated properly.


We will fix the top of the radiator.

We also discussed the unsightly paint problem on the Ivory. The problem is that the paint used is weather checking real bad and he has just been touching it up to keep it stuck in place.
Over the winter I will be stripping all the Ivory on the exterior. Removing the DuPont fill N sand primer and redoing it with new state of the art epoxy followed with single stage Urethane 1956 Ivory
Stay tuned as I post updates.